Connecting Plex and Splunk

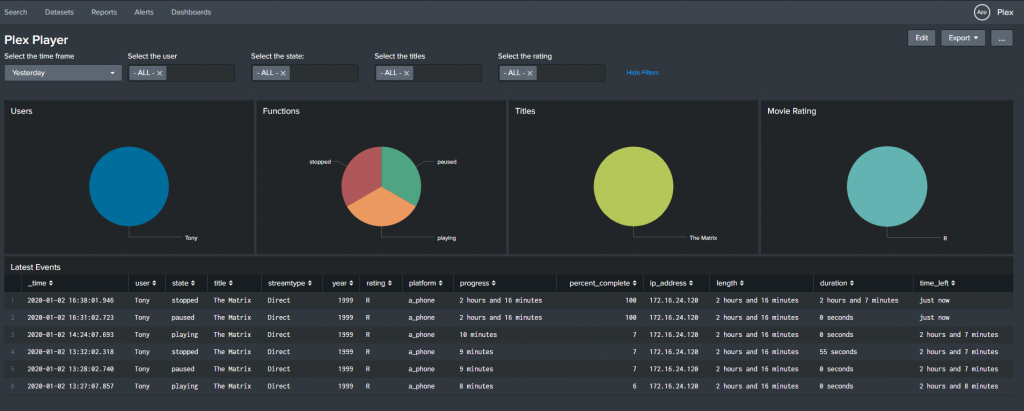
I use Plex (https://www.plex.tv/) to be able to play videos at home. Different family members have their own accounts on Plex. I was interested in the viewing habits of the people using my Plex server. If you put Plex in debug mode you can get a lot of logs but I wanted a better way.

I found PlexWatch (https://github.com/ljunkie/plexWatch) on Github. PlexWatch is listed as “Notify and Log watched content on a Plex Media Server”. What made me interested in this project is that you could extend it to connect to external providers (Twitter, Boxcar, Prowl, …). I was hoping I could use this to connect to Splunk’s HEC (HTTP Event Collector).

I was able to also find a Splunk HEC library for Perl on Github. The project is called “Perl Client for Splunk HTTP Event Collector” and at https://github.com/eforbus/perl-splunk-hec.

Requirements:
1. Command line access to a Plex server
2. Splunk instance with HEC enabled
3. Perl installed or ability to have it installed


Below is the step by step I created to connect PlexWatch with Splunk via the HEC. This was done on a CentOS 7 server.

1. Enable the EPEL Release Repo

sudo yum -y –enablerepo=extras install epel-release

2. Add the dependancies

sudo yum -y install perl\(LWP::UserAgent\) perl\(XML::Simple\) perl\(Pod::Usage\) perl\(JSON\) perl\(DBI\) perl-Time-Duration perl-Time-ParseDate perl-DBD-SQLite perl-LWP-Protocol-https perl-Crypt-SSLeay perl-File-ReadBackwards perl-JSON-XS

3. Create the directory for PlexWatch

sudo mkdir /opt/plexWatch/

4. Download the PlexWatch components

sudo wget -P /opt/plexWatch/ https://raw.github.com/ljunkie/plexWatch/master/plexWatch.pl

sudo wget -P /opt/plexWatch/ https://raw.github.com/ljunkie/plexWatch/master/config.pl-dist

3. Create the directory for PlexWatch

sudo mkdir /opt/plexWatch/

5. Set the permissions for the folder and script

sudo chmod 777 /opt/plexWatch && sudo chmod 755 /opt/plexWatch/plexWatch.pl

6. Copy the configuration file from the default to the one used by the script

sudo cp /opt/plexWatch/config.pl-dist /opt/plexWatch/config.pl

7. Edit the configuration file. In the examples I show will be using VIM but in the walk through I show VI. Nano can also be used.

sudo vi /opt/plexWatch/config.pl

7a. Change the $log_client_ip to equal 1 and set the $myPlex_user and $myPlex_pass variables. The $myPlex_user and $myPlex_pass are the credentials to log in to plex.tv.

config.pl section for external ip address and Plex account

7b. Near the end of the configuration file, find the external section. It will look like the below.

config.pl external script area

7c. Add a new section for the Splunk HEC connector.

config.pl script with added section for sending to Splunk

‘Splunk’ => {
‘enabled’ => 1, ## 0 or 1 – set to 1 to enable Splunk script
‘push_watched’ => 1, #stop
‘push_watching’ => 1, #start
‘push_paused’ => 1, #pause
‘push_resumed’ => 1, #resume


‘script_format’ => {
‘start’ => ‘perl /opt/plexWatch/splunk.pl “{user}” “{state}” “{title}” “{streamtype}” “{year}” “{rating}” “{platform}” “{progress}” “{percent_complete}” “{ip_address}” “{length}” “{duration}” “{time_left}”‘,
‘paused’ => ‘perl /opt/plexWatch/splunk.pl “{user}” “{state}” “{title}” “{streamtype}” “{year}” “{rating}” “{platform}” “{progress}” “{percent_complete}” “{ip_address}” “{length}” “{duration}” “{time_left}”‘,
‘resumed’ => ‘perl /opt/plexWatch/splunk.pl “{user}” “{state}” “{title}” “{streamtype}” “{year}” “{rating}” “{platform}” “{progress}” “{percent_complete}” “{ip_address}” “{length}” “{duration}” “{time_left}”‘,
‘stop’ => ‘perl /opt/plexWatch/splunk.pl “{user}” “{state}” “{title}” “{streamtype}” “{year}” “{rating}” “{platform}” “{progress}” “{percent_complete}” “{ip_address}” “{length}” “{duration}” “{time_left}”‘,
},
},

8. Download the Splunk HEC connector library for Perl.

wget https://github.com/eforbus/perl-splunk-hec/archive/master.zip

9. Unzip the the connector

unzip master.zip

10. Copy the libraries to the PlexWatch directory

sudo cp -R ./perl-splunk-hec-master/lib/Splunk /opt/plexWatch/

11. Create and edit the HEC script. This will be what is called from PlexWatch to send the data to the HEC.

sudo vi /opt/plexWatch/splunk.pl

11a. Below is the script. You will need your Splunk server path and HEC token.

splunk.pl Perl script

#!/usr/bin/perl

use lib qw(/opt/plexWatch/);

use Splunk::HEC;

$user=$ARGV[0];
$state=$ARGV[1];
$title=$ARGV[2];
$streamtype=$ARGV[3];
$year=$ARGV[4];
$rating=$ARGV[5];
$platform=$ARGV[6];
$progress=$ARGV[7];
$percent_complete=$ARGV[8];
$ip_address=$ARGV[9];
$show_length=$ARGV[10];
$duration=$ARGV[11];
$time_left=$ARGV[12];

my $hec = Splunk::HEC->new(
url => ‘https://SplunkServer:8088/services/collector/event’,
token => ‘6cc8b5ba-48f3-5c2b-8e9e-9e5e81a0ce57’
);

my $res = $hec->send(event => {user => $user, state => $state, title => $title, streamtype => $streamtype, year => $year, rating => $rating, platform => $platform, progress => $progress, percent_complete => $percent_complete, ip_address => $ip_address, length => $show_length, duration => $duration, time_left => $time_left});

12. Change the abilities of the script to be executable

sudo chmod +x /opt/plexWatch/splunk.pl

13. Test the script. This will send sample data to the Splunk HEC.

/opt/plexWatch/splunk.pl user state title streamtype year rating platform progress percent_complete ip_address length duration time_left

14. Add the PlexWatch script in to the crontab to run on a schedule

sudo crontab -e

14a. Have the script run once per minute

* * * * * /opt/plexWatch/plexWatch.pl

Enjoy the data in Splunk

JSON Data Example
Dashboard Example
Dashboard Example

SpeedCam – Getting the Data

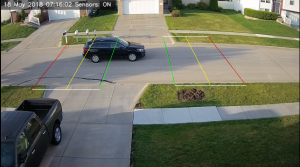
I recently got to be in be on the news for a fun project (see the bottom of the article for the video).  We have had issues with cars speeding down our street.  I have had the traffic department place the street sign that showed your speed down the street.  This did give us some data, but people seeing the signs changed their driving during that drive only.

Being a person that works with data, I thought there has to be a way to track this data source.  I tried to build my own system to track the cars going by.  After trying a few different things, Arduino and Raspberry Pi, I started reading on using a webcams to track cars.

My setup is as followed:
Camera: HIKVision IP Camera (but a USB camera will work also as shown in the news video)
Power Injector: TP-LINK TL-PoE150S
Computer: Dell Laptop running Windows 10
Speed Camera Software: SpeedCam AI
Data Analyst Tool: Splunk

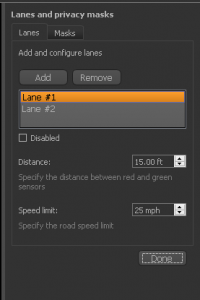
I tried a few different programs and found SpeedCam AI.  This program let me draw a rectangle and define the distance.  I know that the sections of the street are 15 feet (4.572 meters) in length.

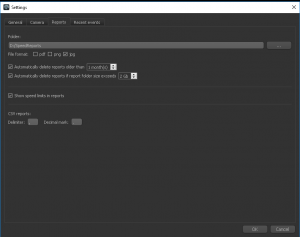
I set up two different lanes.  Lane 1 is for West bound traffic and Lane 2 is for East bound traffic.  In the settings you can specify what the delimiter.  You can also use the software to save a picture of the vehicle, and clean up the reports.

With SpeedCam AI writing the details of traffic to a csv file, Splunk can easily ingest the data.

Installing Splunk on Windows
Installing Splunk on Linux

Adding the data to Splunk:
Once you log in to Splunk, you should see an “Add Data” button.

There is a couple options for bringing the data in.  Select “Monitor” to be able to continuously bring in the data.

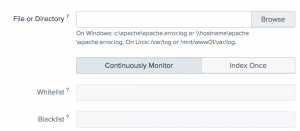
You will then want to select “Files & Directories”.

Click “Browse” to select your “reports.csv” file and then click “Next”.

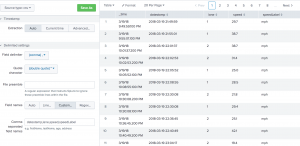
You should see a preview of your data.  You will see that Splunk has identified the data in a csv file.  Since the file doesn’t have a header row, you will need to give it one.  In the delimited settings, in the Field names section, click Custom.  In this example I used “datestamp,lane,speed,speedLabel”.  Then click next to continue.

It should prompt you to save your custom sourcetype.  Click Save.

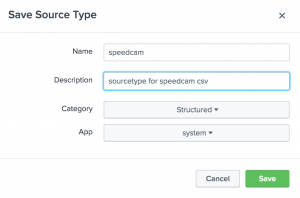
I gave the sourcetype name as “speedcam”.  I then gave it a description and left the category and app the defaults and then click Save.

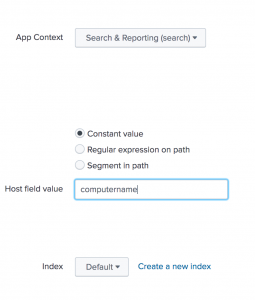
On the next page we can set the hostname for the data stream. Normally you can leave this the default. In a production environment, we would also want to choose our index. For this example, I am going to leave it as “Default”. At this point we can click “Review”.

You can review the setting and then click Submit and it will start bringing in your data.


For the Command Line People
## inputs.conf ##
[monitor://c:\program files(86)\SpeedCam\reports\reports.csv]
sourcetype = speedcam

## props.conf ##
[speedcam]
INDEXED_EXTRACTIONS = CSV
FIELD_DELIMITER = ,
FIELD_NAMES = datestamp,lane,speed,speedLabel
CHECK_FOR_HEADER = false
SHOULD_LINEMERGE = false


At this point, you have the SpeedCam AI software running and Splunk bringing the data in.  I will follow up with another post on the Splunk App I have written.  In the mean time, here are a few videos on searching and reporting in Splunk.

Basic Searching in Splunk
Creating Reports in Splunk Enterprise
Create Dashboards in Splunk Enterprise

ElectroSmash pedalShield Mega – Part 1

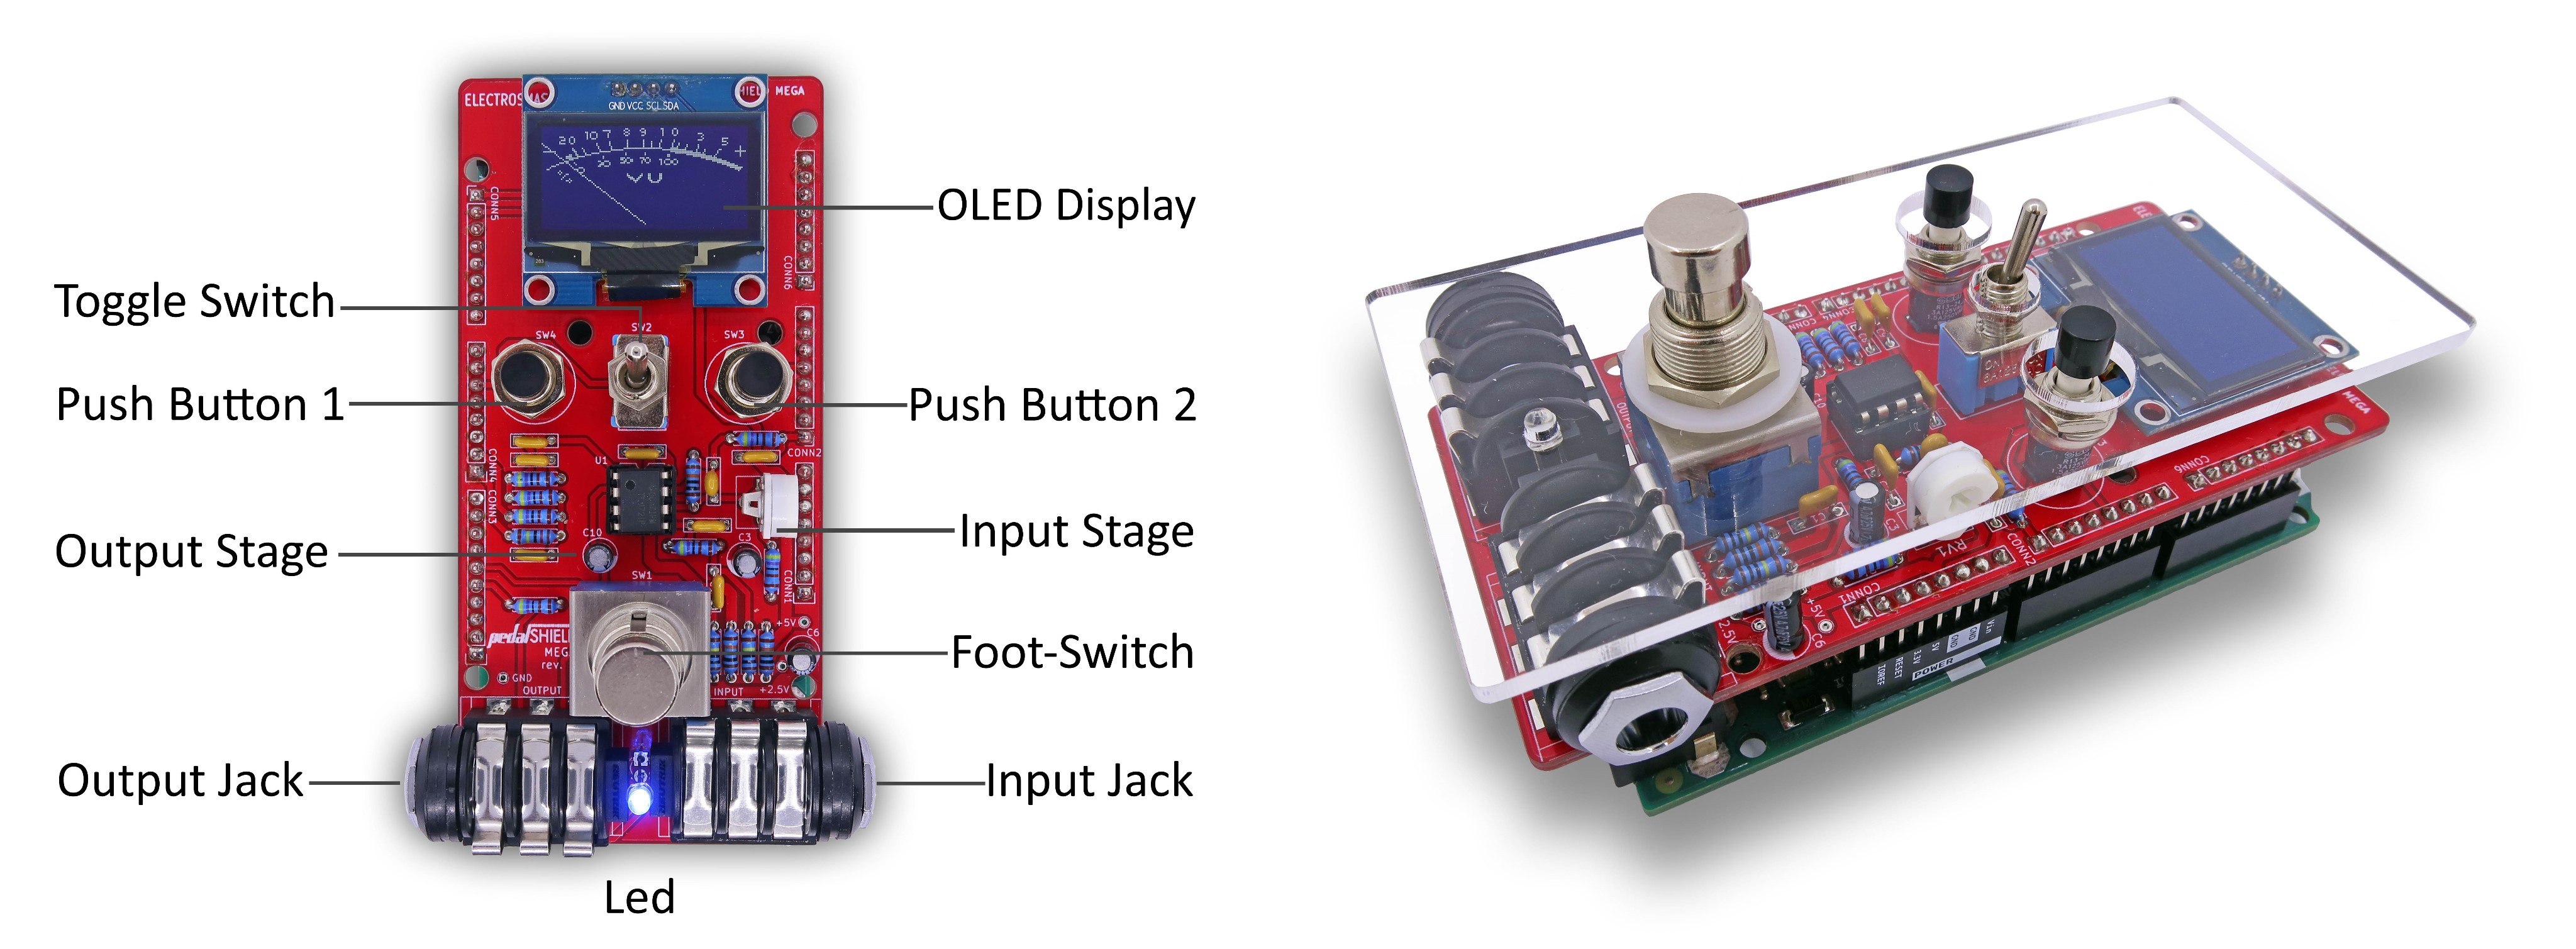
My oldest son has been getting really in to music lately.  He has taught himself guitar, bass, ukulele, piano, and most recently violin.  Having an electrical background, I started to look at the different ways the pedals and guitars are put together.  I started to look at the pedal clones and wanted to do a pedal for my son.  After looking around I saw the pedalShield series.  I like working with Arduinos and Raspberry Pis as you still get to use real components and easily interact with them. The pedalShield Mega looked interesting as it has an LED screen on it to help you see your effects.  I was also interested in being able flash new effects on the pedal as needed.

I have decided to give it a go and have ordered the pedalSHIELD MEGA Kit.  They give you all the schematics and part numbers (minus the LED) to order them yourself from Mouser.  Pricing it out, you do save money ordering the kit directly from ElectroSmash.  The only problem for me is that it is international shipping so a bit of a wait.  I also needed to order the Arduino Mega 2560 board.  That is the brains of the programmable pedal.  My normal go to is Adafruit.  On their site it lists the board as discontinued (link).  After reading a few reviews, I decided to go with a clone board from Amazon.  I went with the Elegoo LYSB01H4ZDYCE-ELECTRNCSMEGA 2560 R3 Board.  While I was on the Amazon site, I felt that to do the job properly I need a new soldering iron, helping hands, and cutter.  The quick math is that I will be doing around 141 solder points for this project.

So far I have spent $108.92 on the project:
$14.86 – Arduino Mega 2560 Clone
$25.85 – Tools
$00.00 – Amazon Prime Shipping
$53.84 – ElectroSmash Kit
$14.37 – Shipping from ElectroSmash

I will still need to get some stand offs to make sure everything is nice and stable when he steps on the pedal and the case enclosure.

I have been going through the forums and looking at the work other have already done with the programming.  I look forward to this project as I haven’t done a project like this in a while.

Installing SNMP through the Command Line – Part 2

I added a batch script I wrote to install SNMP on a bunch of machine back on Jan. 14, 2012 (http://www.anthonyreinke.com/?p=455).  I have since modified the script.  Changing the file from a .bat to a .cmd will allow you to right click and run as administrator on Windows 2008.  Also I noticed in 2008, it defaults in to having the localhost as the only system that can communicate to the SNMP Service.

PsExec.exe @hosts.txt -s -c installsnmp.cmd

Below is the file to download.  Rename the file to installsnmp.cmd
installsnmp.cmd.txt

As always, please contact me if you have questions.

@echo off
cls
REM Detect if the system is Windows Server 2003
systeminfo | find "2003" > nul
if %ERRORLEVEL% == 0 goto 2003
REM Detect if the system is Windows XP
systeminfo | find "XP Pro" > nul
if %ERRORLEVEL% == 0 goto XPPro
REM Detect if the system is Windows XP
systeminfo | find "2008" > nul
if %ERRORLEVEL% == 0 goto 2008
REM If the system is Windows Vista, Windows Server 2008, or higher, 
REM they have the required files built in.
goto ERROR
:2003
REM If Windows 2003, set the path to the i386 directory
REM Note: The path needs to be one level above the i386 directory
REM Example: if the path is \\server\share\windows2003\i386\ then
REM the path would be \\server\share\windows2003\
REM Note that the you need both a 32bit and 64bit versions
if (%PROCESSOR_ARCHITECTURE%) == (AMD64) (
echo Windows Registry Editor Version 5.00
echo.
echo [HKEY_LOCAL_MACHINE\SOFTWARE\Microsoft\Windows\CurrentVersion\Setup]
echo "SourcePath"="\\\\server\\share\\Extracted\\Win2003x64\\"
echo "ServicePackSourcePath"="\\\\server\\share\\Extracted\\Win2003x64\\"
) > %temp%\setW2003Path.reg
IF (%PROCESSOR_ARCHITECTURE%) == (x86) (
echo Windows Registry Editor Version 5.00
echo.
echo [HKEY_LOCAL_MACHINE\SOFTWARE\Microsoft\Windows\CurrentVersion\Setup]
echo "SourcePath"="\\\\server\\share\\Extracted\\Win2003\\"
echo "ServicePackSourcePath"="\\\\server\\share\\Extracted\\Win2003\\"
) > %temp%\setW2003Path.reg
REM Installing the created Registry File
regedit /s /q %temp%\setW2003Path.reg
goto SNMP
:XPPro
REM If Windows XP Professional, set the path to the i386 directory
REM Note: The path needs to be one level above the i386 directory
REM Example: if the path is \\server\share\windowsXP\i386\ then
REM the path would be \\server\share\windowsXP\
if (%PROCESSOR_ARCHITECTURE%) == (AMD64) (
(
echo Windows Registry Editor Version 5.00
echo.
echo [HKEY_LOCAL_MACHINE\SOFTWARE\Microsoft\Windows\CurrentVersion\Setup]
echo "SourcePath"="\\\\server\\share\\Extracted\\XPProx64\\"
echo "ServicePackSourcePath"="\\\\server\\share\\Extracted\\XPProx64\\"
) > %temp%\setXPProPath.reg
) ELSE IF (%PROCESSOR_ARCHITECTURE%) == (x86)
(
echo Windows Registry Editor Version 5.00
echo.
echo [HKEY_LOCAL_MACHINE\SOFTWARE\Microsoft\Windows\CurrentVersion\Setup]
echo "SourcePath"="\\\\server\\share\\Extracted\\XPPro\\"
echo "ServicePackSourcePath"="\\\\server\\share\\Extracted\\XPPro\\"
) > %temp%\setXPProPath.reg
)
REM Installing the created Registry File
regedit /s /q %temp%\setXPProPath.reg.reg
goto SNMP
:2008
REM Since 2008 stopped using the sysocmgr.exe to install features, in Vista and higher
REM you need to use the servermanagercmd.exe to add features. A great list of the 
REM features and their command line install string is at:
REM http://www.techrepublic.com/blog/datacenter/install-windows-server-2008-features-with-servermanagercmd/294
servermanagercmd.exe -install SNMP-Services
goto Strings
:SNMP
REM Building the Unattended Install
(
echo ;SetupMgrTag
echo [NetOptionalComponents]
echo SNMP=1
echo [SNMP]
echo Any_Host=YES
) > %temp%\snmp.txt
REM Installing the SNMP application with the Unattended Install
sysocmgr /i:%windir%\inf\sysoc.inf /u:%temp%\snmp.txt
goto Strings
:Strings
REM Removing the public string
(
echo Windows Registry Editor Version 5.00
echo.
echo [-HKEY_LOCAL_MACHINE\SYSTEM\ControlSet001\Services\SNMP\Parameters\ValidCommunities]
REM Removing the only allow localhost communication, by default 2008 will only allow the 
REM localhsot to talk to the SNMP service
echo [-HKEY_LOCAL_MACHINE\SYSTEM\ControlSet001\services\SNMP\Parameters\PermittedManagers]
REM Setting the SNMP strings
echo.
REM Setting the SNMP Contact Info
echo [HKEY_LOCAL_MACHINE\SYSTEM\ControlSet001\Services\SNMP\Parameters\RFC1156Agent]
echo "sysContact"="Server Administrators"
echo "sysLocation"="Server Room"
echo "sysServices"=dword:0000004f
echo.
REM Setting the Read Only and Read Write Communities
echo [HKEY_LOCAL_MACHINE\SYSTEM\ControlSet001\Services\SNMP\Parameters\ValidCommunities]
echo "readonly"=dword:00000004
echo "readwrite"=dword:00000008
echo.
REM Creating the Permitted Managers Key
echo [HKEY_LOCAL_MACHINE\SYSTEM\ControlSet001\services\SNMP\Parameters\PermittedManagers]
echo.
) > %temp%\setupsnmp.reg
REM Installing the created Registry File
regedit /s /q %temp%\setupsnmp.reg
REM Cleaning Up
IF EXIST %temp%\setupsnmp.reg del %temp%\setupsnmp.reg
IF EXIST %temp%\setW2003Path.reg del %temp%\setW2003Path.reg
IF EXIST %temp%\setXPProPath.reg.reg del %temp%\setXPProPath.reg.reg
IF EXIST %temp%\snmp.txt del %temp%\snmp.txt
echo %COMPUTERNAME% Complete >> \\server\share\SNMP\SNMPInstall.txt
goto END
:ERROR
echo.
echo Could not determine the OS type
pause
goto END
:END


Automating a New Email Profile

I have been helping a company move to a new cloud based email system.  They needed to update everyone’s mail profile.  In this follow VBScript, it builds a .prf file to be imported in with the correct fields for the user and servers.  Near the top of the script there is a section to be filled out by a person that knows the Exchange environment, Exchange Administrator.

‘ Define our servers and paths 
strProxy = “”
strAutoDiscoverProxy = “”
strProfileName = “”
strHomeServer = “”
strRPCProxyPrincipalName = “”
 

The script will ask the user their primary email address.  For the company I was helping out they had multiple email domains so we needed them to select their primary.  It then will ask them to confirm what they typed.

SetupNewOutlook

#####################################

‘++++++++++++++++++++++++++++++++++++++++++++++++++++++++++++++++++++++++++++++
‘ Add email profile for Another Exchange Provider
‘++++++++++++++++++++++++++++++++++++++++++++++++++++++++++++++++++++++++++++++
Option Explicit
On Error Resume Next’ Declare our varibles
Dim template, strInput, intAnswer, strProxy, strAutoDiscoverProxy, strProfileName, strHomeServer, strRPCProxyPrincipalName’ Define our servers and paths                                  Examples
strProxy = “”                                                                   ‘ strProxy = “webmail.yourdomain.com”
strAutoDiscoverProxy = “”                                      ‘ strAutoDiscoverProxy = “https://webmail.yourdomain.com/autodiscoverproxy/autodiscover.xml”
strProfileName = “”                                                     ‘ strProfileName = “New Cloud Email”
strHomeServer = “”                                                     ‘ strHomeServer = “MyExchangeServer”
strRPCProxyPrincipalName = “”                            ‘ strRPCProxyPrincipalName = “msstd:webmail.yourdomain.com”‘ This loop section is here to have the user verify their email address
‘ Starting the Loop. This will loop from this point until the answer is Yes
Do Until intAnswer = vbYes‘ Asking the user their primary email address
strInput = UserInput( “Please enter your primary email address:” )

‘ This is asking the user to confirm their primary email address
intAnswer = _
Msgbox(“Completing reconfiguration of Outlook for email address: ” & strInput & vbCr & “This is correct?”, _
vbYesNo, “Confirm Email Address”)

‘ This will loop the script back to the start of the Loop function. If the user click
‘ Yes, then the function will exit the loop. If the user answered No, the function will
‘ start over and prompt the user for their primary email address.
Loop

Function UserInput( myPrompt )
‘ This function prompts the user for some input.
‘ When the script runs in CSCRIPT.EXE, StdIn is used,
‘ otherwise the VBScript InputBox( ) function is used.
‘ myPrompt is the the text used to prompt the user for input.
‘ The function returns the input typed either on StdIn or in InputBox( ).
‘ Written by Rob van der Woude
‘ http://www.robvanderwoude.com
‘ Check if the script runs in CSCRIPT.EXE
If UCase( Right( WScript.FullName, 12 ) ) = “\CSCRIPT.EXE” Then
‘ If so, use StdIn and StdOut
WScript.StdOut.Write myPrompt & ” “
UserInput = WScript.StdIn.ReadLine
Else
‘ If not, use InputBox( )
UserInput = InputBox( myPrompt )
End If
End Function

template = “;Automatically generated PRF file” & VbCrLF &_
VbCrLF &_
“; **************************************************************” & VbCrLF &_
“; Section 1 – Profile Defaults” & VbCrLF &_
“; **************************************************************” & VbCrLF &_
VbCrLF &_
“[General]” & VbCrLF &_
“Custom=1” & VbCrLF &_
“ProfileName=Cloud Email” & VbCrLF &_
“DefaultProfile=No” & VbCrLF &_
“OverwriteProfile=No” & VbCrLF &_
“ModifyDefaultProfileIfPresent=FALSE” & VbCrLF &_
“BackupProfile=No ” & VbCrLF &_
“DefaultStore=Service1” & VbCrLF &_
VbCrLF &_
“; **************************************************************” & VbCrLF &_
“; Section 2 – Services in Profile” & VbCrLF &_
“; **************************************************************” & VbCrLF &_
VbCrLF &_
“[Service List]” & VbCrLF &_
“ServiceX=Microsoft Outlook Client” & VbCrLF &_
“ServiceEGS=Exchange Global Section” & VbCrLF &_
“Service1=Microsoft Exchange Server” & VbCrLF &_
“ServiceEGS=Exchange Global Section” & VbCrLF &_
“Service2=Outlook Address Book” & VbCrLF &_
VbCrLF &_
“;***************************************************************” & VbCrLF &_
“; Section 3 – List of internet accounts” & VbCrLF &_
“;***************************************************************” & VbCrLF &_
VbCrLF &_
“[Internet Account List]” & VbCrLF &_
VbCrLF &_
“;***************************************************************” & VbCrLF &_
“; Section 4 – Default values for each service.” & VbCrLF &_
“;***************************************************************” & VbCrLF &_
VbCrLF &_
“[ServiceX]” & VbCrLF &_
“CachedExchangeMode=0x00000002” & VbCrLF &_
“CachedExchangeSlowDetect=TRUE” & VbCrLF &_
VbCrLF &_
“[ServiceEGS]” & VbCrLF &_
“CachedExchangeConfigFlags=0x00000100” & VbCrLF &_
“MailboxName=” & strInput & VbCrLF &_
“HomeServer=” & strHomeServer & VbCrLF &_
“RPCoverHTTPflags=0x002f” & VbCrLF &_
“RPCProxyServer=” & strProxy & VbCrLF &_
“RPCProxyPrincipalName=msstd:” & strRPCProxyPrincipalName & VbCrLF &_
“RPCProxyAuthScheme=0x0001” & VbCrLF &_
VbCrLF &_
“[Service1]” & VbCrLF &_
“OverwriteExistingService=No” & VbCrLF &_
“UniqueService=No” & VbCrLF &_
“MailboxName=” & strInput & VbCrLF &_
“HomeServer=” & strHomeServer & VbCrLF &_
“AccountName=Microsoft Exchange Server” & VbCrLF &_
VbCrLF &_
“;***************************************************************” & VbCrLF &_
“; Section 5 – Values for each internet account.” & VbCrLF &_
“;***************************************************************” & VbCrLF &_
VbCrLF &_
“;***************************************************************” & VbCrLF &_
“; Section 6 – Mapping for profile properties” & VbCrLF &_
“;***************************************************************” & VbCrLF &_
VbCrLF &_
“[Microsoft Exchange Server]” & VbCrLF &_
“ServiceName=MSEMS” & VbCrLF &_
“MDBGUID=5494A1C0297F101BA58708002B2A2517” & VbCrLF &_
“MailboxName=PT_STRING8,0x6607” & VbCrLF &_
“HomeServer=PT_STRING8,0x6608” & VbCrLF &_
“OfflineAddressBookPath=PT_STRING8,0x660E” & VbCrLF &_
“OfflineFolderPath=PT_STRING8,0x6610” & VbCrLF &_
VbCrLF &_
“[Exchange Global Section]” & VbCrLF &_
“SectionGUID=13dbb0c8aa05101a9bb000aa002fc45a” & VbCrLF &_
“MailboxName=PT_STRING8,0x6607” & VbCrLF &_
“HomeServer=PT_STRING8,0x6608” & VbCrLF &_
“RPCoverHTTPflags=PT_LONG,0x6623” & VbCrLF &_
“RPCProxyServer=PT_UNICODE,0x6622” & VbCrLF &_
“RPCProxyPrincipalName=PT_UNICODE,0x6625” & VbCrLF &_
“RPCProxyAuthScheme=PT_LONG,0x6627” & VbCrLF &_
“CachedExchangeConfigFlags=PT_LONG,0x6629” & VbCrLF &_
VbCrLF &_
“[Microsoft Mail]” & VbCrLF &_
“ServiceName=MSFS” & VbCrLF &_
“ServerPath=PT_STRING8,0x6600” & VbCrLF &_
“Mailbox=PT_STRING8,0x6601” & VbCrLF &_
“Password=PT_STRING8,0x67f0” & VbCrLF &_
“RememberPassword=PT_BOOLEAN,0x6606” & VbCrLF &_
“ConnectionType=PT_LONG,0x6603” & VbCrLF &_
“UseSessionLog=PT_BOOLEAN,0x6604” & VbCrLF &_
“SessionLogPath=PT_STRING8,0x6605” & VbCrLF &_
“EnableUpload=PT_BOOLEAN,0x6620” & VbCrLF &_
“EnableDownload=PT_BOOLEAN,0x6621” & VbCrLF &_
“UploadMask=PT_LONG,0x6622” & VbCrLF &_
“NetBiosNotification=PT_BOOLEAN,0x6623” & VbCrLF &_
“NewMailPollInterval=PT_STRING8,0x6624” & VbCrLF &_
“DisplayGalOnly=PT_BOOLEAN,0x6625” & VbCrLF &_
“UseHeadersOnLAN=PT_BOOLEAN,0x6630” & VbCrLF &_
“UseLocalAdressBookOnLAN=PT_BOOLEAN,0x6631” & VbCrLF &_
“UseExternalToHelpDeliverOnLAN=PT_BOOLEAN,0x6632” & VbCrLF &_
“UseHeadersOnRAS=PT_BOOLEAN,0x6640” & VbCrLF &_
“UseLocalAdressBookOnRAS=PT_BOOLEAN,0x6641” & VbCrLF &_
“UseExternalToHelpDeliverOnRAS=PT_BOOLEAN,0x6639” & VbCrLF &_
“ConnectOnStartup=PT_BOOLEAN,0x6642” & VbCrLF &_
“DisconnectAfterRetrieveHeaders=PT_BOOLEAN,0x6643” & VbCrLF &_
“DisconnectAfterRetrieveMail=PT_BOOLEAN,0x6644” & VbCrLF &_
“DisconnectOnExit=PT_BOOLEAN,0x6645” & VbCrLF &_
“DefaultDialupConnectionName=PT_STRING8,0x6646” & VbCrLF &_
“DialupRetryCount=PT_STRING8,0x6648” & VbCrLF &_
“DialupRetryDelay=PT_STRING8,0x6649” & VbCrLF &_
VbCrLF &_
“[Personal Folders]” & VbCrLF &_
“ServiceName=MSPST MS” & VbCrLF &_
“Name=PT_STRING8,0x3001” & VbCrLF &_
“PathToPersonalFolders=PT_STRING8,0x6700 ” & VbCrLF &_
“RememberPassword=PT_BOOLEAN,0x6701” & VbCrLF &_
“EncryptionType=PT_LONG,0x6702” & VbCrLF &_
“Password=PT_STRING8,0x6703” & VbCrLF &_
VbCrLF &_
“[Unicode Personal Folders]” & VbCrLF &_
“ServiceName=MSUPST MS” & VbCrLF &_
“Name=PT_UNICODE,0x3001” & VbCrLF &_
“PathToPersonalFolders=PT_STRING8,0x6700 ” & VbCrLF &_
“RememberPassword=PT_BOOLEAN,0x6701” & VbCrLF &_
“EncryptionType=PT_LONG,0x6702” & VbCrLF &_
“Password=PT_STRING8,0x6703” & VbCrLF &_
VbCrLF &_
“[Outlook Address Book]” & VbCrLF &_
“ServiceName=CONTAB” & VbCrLF &_
VbCrLF &_
“[LDAP Directory]” & VbCrLF &_
“ServiceName=EMABLT” & VbCrLF &_
“ServerName=PT_STRING8,0x6600” & VbCrLF &_
“UserName=PT_STRING8,0x6602” & VbCrLF &_
“UseSSL=PT_BOOLEAN,0x6613” & VbCrLF &_
“UseSPA=PT_BOOLEAN,0x6615” & VbCrLF &_
“DisableVLV=PT_LONG,0x6616” & VbCrLF &_
“DisplayName=PT_STRING8,0x3001” & VbCrLF &_
“ConnectionPort=PT_STRING8,0x6601” & VbCrLF &_
“SearchTimeout=PT_STRING8,0x6607” & VbCrLF &_
“MaxEntriesReturned=PT_STRING8,0x6608” & VbCrLF &_
“SearchBase=PT_STRING8,0x6603” & VbCrLF &_
VbCrLF &_
“[Microsoft Outlook Client]” & VbCrLF &_
“SectionGUID=0a0d020000000000c000000000000046” & VbCrLF &_
“FormDirectoryPage=PT_STRING8,0x0270” & VbCrLF &_
“WebServicesLocation=PT_STRING8,0x0271” & VbCrLF &_
“ComposeWithWebServices=PT_BOOLEAN,0x0272” & VbCrLF &_
“PromptWhenUsingWebServices=PT_BOOLEAN,0x0273” & VbCrLF &_
“OpenWithWebServices=PT_BOOLEAN,0x0274” & VbCrLF &_
“CachedExchangeMode=PT_LONG,0x041f” & VbCrLF &_
“CachedExchangeSlowDetect=PT_BOOLEAN,0x0420” & VbCrLF &_
VbCrLF &_
“[Personal Address Book]” & VbCrLF &_
“ServiceName=MSPST AB” & VbCrLF &_
“NameOfPAB=PT_STRING8,0x001e3001” & VbCrLF &_
“Path=PT_STRING8,0x001e6600” & VbCrLF &_
“ShowNamesBy=PT_LONG,0x00036601” & VbCrLF &_
VbCrLF &_
“; ************************************************************************” & VbCrLF &_
“; Section 7 – Mapping for internet account properties. DO NOT MODIFY.” & VbCrLF &_
“; ************************************************************************” & VbCrLF &_
VbCrLF &_
“[I_Mail]” & VbCrLF &_
“AccountType=POP3” & VbCrLF &_
“;— POP3 Account Settings —” & VbCrLF &_
“AccountName=PT_UNICODE,0x0002” & VbCrLF &_
“DisplayName=PT_UNICODE,0x000B” & VbCrLF &_
“EmailAddress=PT_UNICODE,0x000C” & VbCrLF &_
“;— POP3 Account Settings —” & VbCrLF &_
“POP3Server=PT_UNICODE,0x0100” & VbCrLF &_
“POP3UserName=PT_UNICODE,0x0101” & VbCrLF &_
“POP3UseSPA=PT_LONG,0x0108” & VbCrLF &_
“Organization=PT_UNICODE,0x0107” & VbCrLF &_
“ReplyEmailAddress=PT_UNICODE,0x0103” & VbCrLF &_
“POP3Port=PT_LONG,0x0104” & VbCrLF &_
“POP3UseSSL=PT_LONG,0x0105” & VbCrLF &_
“; — SMTP Account Settings —” & VbCrLF &_
“SMTPServer=PT_UNICODE,0x0200” & VbCrLF &_
“SMTPUseAuth=PT_LONG,0x0203” & VbCrLF &_
“SMTPAuthMethod=PT_LONG,0x0208” & VbCrLF &_
“SMTPUserName=PT_UNICODE,0x0204” & VbCrLF &_
“SMTPUseSPA=PT_LONG,0x0207” & VbCrLF &_
“ConnectionType=PT_LONG,0x000F” & VbCrLF &_
“ConnectionOID=PT_UNICODE,0x0010” & VbCrLF &_
“SMTPPort=PT_LONG,0x0201” & VbCrLF &_
“SMTPUseSSL=PT_LONG,0x0202” & VbCrLF &_
“ServerTimeOut=PT_LONG,0x0209” & VbCrLF &_
“LeaveOnServer=PT_LONG,0x1000” & VbCrLF &_
VbCrLF &_
“[IMAP_I_Mail]” & VbCrLF &_
“AccountType=IMAP” & VbCrLF &_
“;— IMAP Account Settings —” & VbCrLF &_
“AccountName=PT_UNICODE,0x0002” & VbCrLF &_
“DisplayName=PT_UNICODE,0x000B” & VbCrLF &_
“EmailAddress=PT_UNICODE,0x000C” & VbCrLF &_
“;— IMAP Account Settings —” & VbCrLF &_
“IMAPServer=PT_UNICODE,0x0100” & VbCrLF &_
“IMAPUserName=PT_UNICODE,0x0101” & VbCrLF &_
“IMAPUseSPA=PT_LONG,0x0108” & VbCrLF &_
“Organization=PT_UNICODE,0x0107” & VbCrLF &_
“ReplyEmailAddress=PT_UNICODE,0x0103” & VbCrLF &_
“IMAPPort=PT_LONG,0x0104” & VbCrLF &_
“IMAPUseSSL=PT_LONG,0x0105” & VbCrLF &_
“; — SMTP Account Settings —” & VbCrLF &_
“SMTPServer=PT_UNICODE,0x0200” & VbCrLF &_
“SMTPUseAuth=PT_LONG,0x0203” & VbCrLF &_
“SMTPAuthMethod=PT_LONG,0x0208” & VbCrLF &_
“SMTPUserName=PT_UNICODE,0x0204” & VbCrLF &_
“SMTPUseSPA=PT_LONG,0x0207” & VbCrLF &_
“ConnectionType=PT_LONG,0x000F” & VbCrLF &_
“ConnectionOID=PT_UNICODE,0x0010” & VbCrLF &_
“SMTPPort=PT_LONG,0x0201” & VbCrLF &_
“SMTPUseSSL=PT_LONG,0x0202” & VbCrLF &_
“ServerTimeOut=PT_LONG,0x0209” & VbCrLF &_
“CheckNewImap=PT_LONG,0x1100” & VbCrLF &_
“RootFolder=PT_UNICODE,0x1101” & VbCrLF &_
VbCrLF &_
“[INET_HTTP]” & VbCrLF &_
“AccountType=HOTMAIL” & VbCrLF &_
“Account=PT_UNICODE,0x0002” & VbCrLF &_
“HttpServer=PT_UNICODE,0x0100” & VbCrLF &_
“UserName=PT_UNICODE,0x0101” & VbCrLF &_
“Organization=PT_UNICODE,0x0107” & VbCrLF &_
“UseSPA=PT_LONG,0x0108” & VbCrLF &_
“TimeOut=PT_LONG,0x0209” & VbCrLF &_
“Reply=PT_UNICODE,0x0103” & VbCrLF &_
“EmailAddress=PT_UNICODE,0x000C” & VbCrLF &_
“FullName=PT_UNICODE,0x000B” & VbCrLF &_
“Connection Type=PT_LONG,0x000F” & VbCrLF &_
“ConnectOID=PT_UNICODE,0x0010” & VbCrLF

Dim objShell, fso
Set objShell = WScript.CreateObject(“WScript.Shell”)
Set fso = CreateObject(“Scripting.FileSystemObject”)

‘Check for valid windows version
If Not CheckWindowsVersion Then
ExitWithError(“UnsupportedVersion”)
End If

‘Get Outlook Path
Dim outlookPath
outlookPath = GetOutlookPath
If outlookPath = “” Then
ExitWithError(“OutlookNotFound”)
End If

‘Check that Outlook does not running
Dim answer
Do While True
If CheckOutlookIsRunning Then
answer = MsgBox(GetString(“OutlookIsRunning”), vbRetryCancel ,GetString (“MessageCaption”))
If answer = vbCancel Then
WScript.Quit
End If
Else
Exit Do
End If
Loop

‘Adjust Outlook registry settings
AdjustSettings

‘ Configure Autodiscover for Custom email address
Dim customEmail
customEmail = “”

If customEmail <> “” Then
ConfigureAutodiscover customEmail
End If

‘Create temporary file for Outlook profile
Dim tempFile, tempFileName
tempFileName = GetTempFileName
If Err.Number <> 0 Then
ExitWithError(“ProfileCreateError”)
End If
Set tempFile = fso.CreateTextFile(tempFileName, true, true)
If Err.Number <> 0 Then
ExitWithError(“ProfileCreateError”)
End If

‘Write profile to file
tempFile.Write(template)
If Err.Number <> 0 Then
ExitWithError(“ProfileWriteError”)
End If
tempFile.Close

‘Start Outlook
objShell.Exec(outlookPath + ” /importprf “”” + tempFileName + “”””)

Function CheckWindowsVersion

On Error Resume Next
Dim objWMI, colOS, objOS, version
set objWMI = GetObject(“winmgmts:\\.\root\cimv2”)
set colOS = objWMI.InstancesOf(“Win32_OperatingSystem”)

For Each objOS in colOS
version = objOS.Version
If objOS.OSType = 18 Then
If Left(version, 1) > 5 Then
‘ Windows Vista or Windows Server 2008
CheckWindowsVersion = True
Exit Function
ElseIf Left(version, 1) = 5 And Mid(version, 3, 1) = 2 Then
If objOS.OtherTypeDescription = “R2” Then
‘ Windows Server 2003 R2
CheckWindowsVersion = True
Exit Function
ElseIf objOS.ProductType = 1 Then
‘ Windows XP Professional x64 Edition
CheckWindowsVersion = True
Exit Function
Else
‘ Windows Server 2003
If objOS.ServicePackMajorVersion = 0 Then
‘ no any Service Pack
CheckWindowsVersion = False
Exit Function
End If
CheckWindowsVersion = True
Exit Function
End If
ElseIf Left(version, 1) = 5 And Mid(version, 3, 1) = 1 Then
‘Microsoft Windows XP
If objOS.ServicePackMajorVersion > 1 Then
‘ SP2 or later
CheckWindowsVersion = True
Exit Function
ElseIf objOS.ServicePackMajorVersion = 1 Then
‘ SP1, check for installed KB331320
Err.Clear
objShell.RegRead(“HKLM\SOFTWARE\Microsoft\Updates\Windows XP\SP1\KB331320\”)
If Err.Number = 0 Then
CheckWindowsVersion = True
Exit Function
End If
End If
End If
End If
Next
CheckWindowsVersion = False

End Function

Function GetOutlookPath

On Error Resume Next
Dim CLSID, path

‘ First of all check simple location
path = objShell.RegRead(“HKLM\SOFTWARE\Microsoft\Windows\CurrentVersion\App Paths\OUTLOOK.EXE\”)
If path <> “” Then
GetOutlookPath = path
Exit Function
End If

CLSID = objShell.RegRead(“HKLM\Software\Classes\Outlook.Application\CLSID\”)
If Err.Number <> 0 Then
GetOutlookPath “”
Exit Function
End If
path = objShell.RegRead(“HKLM\Software\Classes\CLSID\” & CLSID & “\LocalServer32\”)

‘ Does need to check alternative path ?
if path = “” Then
path = objShell.RegRead(“HKLM\SOFTWARE\Wow6432Node\Classes\CLSID\” & CLSID & “\LocalServer32\”)
End If

‘ If we have an error path will be empty
GetOutlookPath = path

End Function

Function CheckOutlookIsRunning

On Error Resume Next
Dim objWMIService, processList
Set objWMIService = GetObject(“winmgmts:\\.\root\cimv2”)
Set processList = objWMIService.ExecQuery(“Select * from Win32_Process Where Name = “”outlook.exe”””)
If processList.Count > 0 Then
CheckOutlookIsRunning = True
Exit Function
End If
CheckOutlookIsRunning = False

End Function

Sub AdjustSettings

objShell.RegWrite “HKCU\Software\Microsoft\Exchange\Client\Options\PickLogonProfile”, “1”, “REG_SZ”

End Sub

Function GetTempFileName

Dim tfolder, tname, tfile
Const TemporaryFolder = 2
Set tfolder = fso.GetSpecialFolder(TemporaryFolder)
tname = fso.GetTempName
tfile = fso.BuildPath(tfolder.Path, tname)
GetTempFileName = tfile

End Function

Function ExitWithError(stringId)

MsgBox GetString(stringId), vbOKOnly, GetString(“MessageCaption”)
WScript.Quit

End Function

Function GetString(stringId)

Dim messageCaption, outlookNotFound, outlookIsRunning, profileCreateError, profileWriteError, unsupportedVersion
messageCaption = “Outlook Profile Configuration Script”
outlookNotFound = “Unable to locate Microsoft Outlook installation path.”
outlookIsRunning = “Configuration script has determined that Microsoft Outlook is running. Please shut down it and then click Retry.”
profileCreateError = “Unable to create a temporary file for profile.”
profileWriteError = “Unable to save profile into temporary file.”
unsupportedVersion = “Unsupported version of Microsoft Windows. ” & vbLf & “” & vbLf & “The following versions of Microsoft Windows are supported: ” & vbLf & ” – Microsoft Windows XP with Service Pack 2 ” & vbLf & ” – Windows Server 2003 with Service Pack 1 ” & vbLf & ” – or a later operating system”
Dim retStr
Select Case stringId
Case “MessageCaption”
If messageCaption = “” Or Mid(messageCaption, 2, 1) = “4” Then
retStr = “Outlook Profile Configuration Script”
Else
retStr = messageCaption
End If
Case “OutlookNotFound”
If outlookNotFound = “” Or Mid(outlookNotFound, 2, 1) = “5” Then
retStr = “Unable to locate Microsoft Outlook installation path.”
Else
retStr = outlookNotFound
End If
Case “OutlookIsRunning”
If outlookIsRunning = “” Or Mid(outlookIsRunning, 2, 1) = “6” Then
retStr = “Configuration script has determined that Microsoft Outlook is running. Please shut down it and then click Retry.”
Else
retStr = outlookIsRunning
End If
Case “ProfileCreateError”
If profileCreateError = “” Or Mid(profileCreateError, 2, 1) = “7” Then
retStr = “Unable to create a temporary file for profile.”
Else
retStr = profileCreateError
End If
Case “profileWriteError”
If profileWriteError = “” Or Mid(profileWriteError, 2, 1) = “8” Then
retStr = “Unable to save profile into temporary file.”
Else
retStr = profileWriteError
End If
Case “UnsupportedVersion”
If unsupportedVersion = “” Or Mid(unsupportedVersion, 2, 1) = “9” Then
retStr = “Unsupported version of Microsoft Windows. ” & vbLf & “” & vbLf & “The following versions of Microsoft Windows are supported: ” & vbLf & ” – Microsoft Windows XP with Service Pack 2 ” & vbLf & ” – Windows Server 2003 with Service Pack 1 ” & vbLf & ” – or a later operating system”
Else
retStr = unsupportedVersion
End If
Case Else
retStr = stringId
End Select
GetString = retStr
End Function

Sub ConfigureAutodiscover(email)

On Error Resume Next
Dim configTemplate
configTemplate = “<?xml version=””1.0″” encoding=””utf-8″”?>” & VbCrLF &_
“<Autodiscover xmlns=””http://schemas.microsoft.com/exchange/autodiscover/responseschema/2006″”>” & VbCrLF &_
” <Response xmlns=””http://schemas.microsoft.com/exchange/autodiscover/outlook/responseschema/2006a””>” & VbCrLF &_
” <Account>” & VbCrLF &_
” <AccountType>email</AccountType>” & VbCrLF &_
” <Action>redirectUrl</Action>” & VbCrLF &_
” <RedirectUrl>” & strAutoDiscoverProxy & “</RedirectUrl>” & VbCrLF &_
” </Account>” & VbCrLF &_
” </Response>” & VbCrLF &_
“</Autodiscover>” & VbCrLF

Dim folder
Dim objEnv
‘ Get collection by using the Environment property.
Set objEnv = objShell.Environment(“Process”)
folder = objEnv(“APPDATA”) + “\Outlook\”

‘ Check that Outlook is available
Dim ver
ver = objShell.RegRead(“HKCR\Outlook.Application\CurVer\”)
If Err.Number <> 0 Then
Exit Sub
End If

‘ Outlook.Application.XX -> XX
ver = Right(ver, 2)

Dim mailDomain, configFilePath, configFile
mailDomain = Mid(email, Instr(email, “@”) + 1)
If Not fso.FolderExists(folder) Then
fso.CreateFolder(folder)
End If
configFilePath = folder & mailDomain & “.xml”
Set configFile = fso.CreateTextFile(configFilePath, True)
configFile.Write(configTemplate)
configFile.Close
objShell.RegWrite “HKCU\Software\Microsoft\Office\” & ver & “.0\Outlook\AutoDiscover\” & mailDomain, configFilePath, “REG_SZ”
End Sub

Information Gathering on My Own Servers

Currently I am having an issue with not knowing information about the servers I am responsible.   I am not happy not knowing things.  I spent a little time gather different parts of different scripts (hacker / script kiddie style) and compiling them in to one Visual Basic Script.  This script is designed to work against Dell Servers.  It will ask the computer for it name, the OS, OS version number, Service Packs, Bit Level (32 or 64 bit), Dell Warranty info, list of local users, and a list of local groups and the users in the groups.  It takes the list of servers from “hosts.txt” which is just a list of servers or ip addresses where there is one per line.  It will write all the information it gathers in to a file called “report.txt”.

Download the .VBS File

Here is the code:

Option Explicit
Dim url, svctag, wshShell, wshNetwork
Dim strComputer, colGroups, objGroup, objUser
Dim objWMIService, colItems, objItem
Dim warrantyRows, warrantyCols
Dim objsvc,svccount, errorChecking,svc,objNetwork,colAccounts
Dim get_OS_Bit, info, strComputer2, oReg, strKeyPath, strValueName, strValue
Dim objShell, objIE, objWMI
Dim colOSes, objOS
Dim objFSO, objTextFile, objTextFileW, objTextFileO, strNextLine, arrServiceList
Dim i, result
Const ForReading = 1
Const ForAppending = 8
Set objFSO = CreateObject(“Scripting.FileSystemObject”)
Set objTextFileW = objFSO.OpenTextFile (“report.txt”, ForAppending, True)
Set objFSO = CreateObject(“Scripting.FileSystemObject”)
Set objTextFileO = objFSO.OpenTextFile _
(“hosts.txt”, ForReading)
Do Until objTextFileO.AtEndOfStream
strNextLine = objTextFileO.Readline
arrServiceList = Split(strNextLine , “,”)
strComputer = arrServiceList(0)
wscript.echo strComputer
On Error Resume Next
Set colOSes = objWMIService.ExecQuery(“Select * from Win32_OperatingSystem”)
For Each objOS in colOSes
objTextFileW.Writeline “########################################”
objTextFileW.Writeline
objTextFileW.Writeline “========================================”
objTextFileW.Writeline “==            Computer Info           ==”
objTextFileW.Writeline “========================================”
objTextFileW.WriteLine “Computer Name      : ” & objOS.CSName
Next
objTextFileW.WriteLine
Set objWMI = GetObject(“winmgmts:\” & strComputer & “rootCIMV2”)
Set colItems = objWMI.ExecQuery(“SELECT * FROM Win32_OperatingSystem”,,48)
For Each objItem in colItems
objTextFileW.WriteLine “Operating System   : ” & objItem.Caption
objTextFileW.WriteLine “OS Version Number  : ” & objItem.Version
objTextFileW.WriteLine “Service Pack       : ” & objItem.ServicePackMajorVersion
objTextFileW.WriteLine
Next
const HKEY_LOCAL_MACHINE = &H80000002
Set oReg=GetObject(“winmgmts:{impersonationLevel=impersonate}!\” & strComputer & “rootdefault:StdRegProv”)
strKeyPath = “HARDWAREDESCRIPTIONSystemCentralProcessor�”
strValueName = “Identifier”
oReg.GetStringValue HKEY_LOCAL_MACHINE,strKeyPath,strValueName,strValue
if (instr(strValue,”x86″)) then
get_OS_Bit=”32″
elseif (instr(strValue,”64″)) then
get_OS_Bit=”64″
else
get_OS_Bit=”NotSure”
end if
objTextFileW.WriteLine “OS is              : ” & get_OS_Bit & “bit”
objTextFileW.WriteLine
objTextFileW.Writeline “========================================”
objTextFileW.WriteLine “==  Get the Dell warranty information ==”
objTextFileW.Writeline “========================================”
url = “http://support.dell.com/support/topics/global.aspx/support/my_systems_info/details?c=us&cs=RC956904&l=en&s=hied&~lt=bodyonly&~wsf=tabs&servicetag=”
set objIE=createobject(“internetexplorer.application”)
set objShell = WScript.CreateObject(“WScript.Shell”)
set objWMI = GetObject(“winmgmts:{impersonationLevel=impersonate}!\” & strComputer & “rootcimv2”)
If InStr(UCase(objWMI.ExecQuery(“Select Manufacturer From Win32_ComputerSystem”).ItemIndex(0).Manufacturer), “DELL”) = 0 then Err.Raise 2, “This is not a Dell dude!”, “No Service Tag”
svctag = objWMI.ExecQuery  (“Select SerialNumber from Win32_BIOS”).ItemIndex(0).SerialNumber
Set objWMIService = GetObject(“winmgmts:” _
& “{impersonationLevel=impersonate}!\” _
& strComputer & “rootcimv2”)
objTextFileW.WriteLine “Service Tag        : ” & svctag
objIE.navigate url & svctag
do while objIE.readystate<>4 : wscript.sleep 50 : loop
set warrantyRows = objIE.document.getElementsByTagName(“table”).item(1).getElementsByTagName(“table”).item(122).getElementsByTagName(“table”).item(0).getElementsByTagName(“tr”)
For i = 1 to warrantyRows.length – 1
set warrantyCols = warrantyRows.item(i).getElementsByTagName(“td”)
objTextFileW.WriteLine “Description        : ” & warrantyCols.item(0).innerText
objTextFileW.WriteLine “Provider           : ” & warrantyCols.item(1).innerText
objTextFileW.WriteLine “Warranty Extension : ” & warrantyCols.item(122).innerText
objTextFileW.WriteLine “Start Date         : ” & warrantyCols.item(3).innerText
objTextFileW.WriteLine “End Date           : ” & warrantyCols.item(4).innerText
objTextFileW.WriteLine “Days Left          : ” & warrantyCols.item(5).innerText
objTextFileW.WriteLine
Next
objTextFileW.Writeline “========================================”
objTextFileW.WriteLine “==       List all local users         ==”
objTextFileW.Writeline “========================================”
Set objNetwork = CreateObject(“Wscript.Network”)
‘strComputer = objNetwork.ComputerName
Set colAccounts = GetObject(“WinNT://” & strComputer & “”)
colAccounts.Filter = Array(“user”)
For Each objUser In colAccounts
objTextFileW.WriteLine “Local User         : ” & objUser.Name
Next
objTextFileW.WriteLine
objTextFileW.Writeline “===========================================”
objTextFileW.WriteLine “== List all local groups and their users ==”
objTextFileW.Writeline “===========================================”
Set colGroups = GetObject(“WinNT://” & strComputer & “”)
colGroups.Filter = Array(“group”)
For Each objGroup In colGroups
objTextFileW.WriteLine “Group              : ” & objGroup.Name
For Each objUser in objGroup.Members
objTextFileW.WriteLine “User               : ” & objUser.Name
Next
objTextFileW.WriteLine
Next
objTextFileW.WriteLine “== List all services ==”
set objsvc = GetObject(“winmgmts:{impersonationLevel=impersonate}\” & strComputer & “rootcimv2”).ExecQuery (“SELECT * FROM Win32_Service”)
for each svc in objsvc
objTextFileW.WriteLine “Service            : ” & svc.displayname
objTextFileW.WriteLine “Current Status     : ” & svc.state
objTextFileW.WriteLine “Startus Type       : ” & svc.startmode
objTextFileW.WriteLine “Run Server As      : ” & svc.startname
objTextFileW.WriteLine
next
objTextFileW.WriteLine
Loop
objTextFileW.Close