SpeedCam – Getting the Data

I recently got to be in be on the news for a fun project (see the bottom of the article for the video).  We have had issues with cars speeding down our street.  I have had the traffic department place the street sign that showed your speed down the street.  This did give us some data, but people seeing the signs changed their driving during that drive only.

Being a person that works with data, I thought there has to be a way to track this data source.  I tried to build my own system to track the cars going by.  After trying a few different things, Arduino and Raspberry Pi, I started reading on using a webcams to track cars.

My setup is as followed:
Camera: HIKVision IP Camera (but a USB camera will work also as shown in the news video)
Power Injector: TP-LINK TL-PoE150S
Computer: Dell Laptop running Windows 10
Speed Camera Software: SpeedCam AI
Data Analyst Tool: Splunk

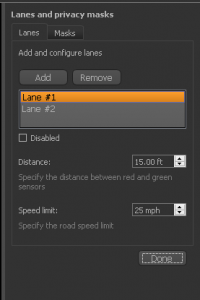
I tried a few different programs and found SpeedCam AI.  This program let me draw a rectangle and define the distance.  I know that the sections of the street are 15 feet (4.572 meters) in length.
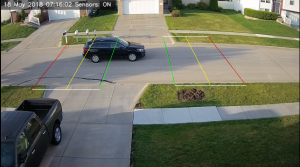
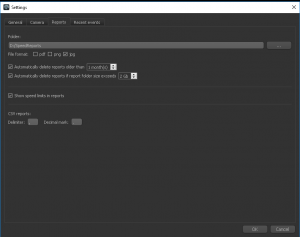
I set up two different lanes.  Lane 1 is for West bound traffic and Lane 2 is for East bound traffic.  In the settings you can specify what the delimiter.  You can also use the software to save a picture of the vehicle, and clean up the reports.

With SpeedCam AI writing the details of traffic to a csv file, Splunk can easily ingest the data.

Installing Splunk on Windows
Installing Splunk on Linux

Adding the data to Splunk:
Once you log in to Splunk, you should see an “Add Data” button.
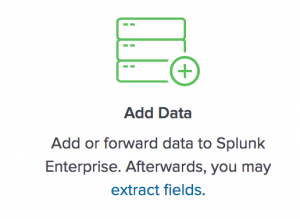
There is a couple options for bringing the data in.  Select “Monitor” to be able to continuously bring in the data.
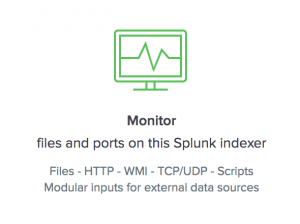
You will then want to select “Files & Directories”.

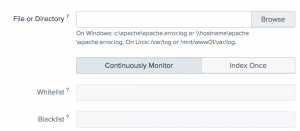
Click “Browse” to select your “reports.csv” file and then click “Next”.
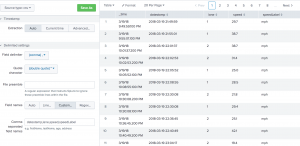
You should see a preview of your data.  You will see that Splunk has identified the data in a csv file.  Since the file doesn’t have a header row, you will need to give it one.  In the delimited settings, in the Field names section, click Custom.  In this example I used “datestamp,lane,speed,speedLabel”.  Then click next to continue.
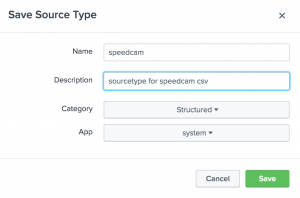
It should prompt you to save your custom sourcetype.  Click Save.

I gave the sourcetype name as “speedcam”.  I then gave it a description and left the category and app the defaults and then click Save.
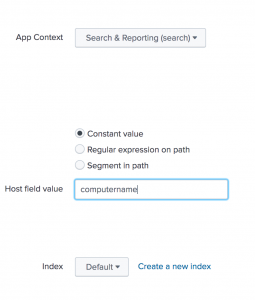
On the next page we can set the hostname for the data stream. Normally you can leave this the default. In a production environment, we would also want to choose our index. For this example, I am going to leave it as “Default”. At this point we can click “Review”.
You can review the setting and then click Submit and it will start bringing in your data.


For the Command Line People
## inputs.conf ##
[monitor://c:\program files(86)\SpeedCam\reports\reports.csv]
sourcetype = speedcam

## props.conf ##
[speedcam]
INDEXED_EXTRACTIONS = CSV
FIELD_DELIMITER = ,
FIELD_NAMES = datestamp,lane,speed,speedLabel
CHECK_FOR_HEADER = false
SHOULD_LINEMERGE = false


At this point, you have the SpeedCam AI software running and Splunk bringing the data in.  I will follow up with another post on the Splunk App I have written.  In the mean time, here are a few videos on searching and reporting in Splunk.

Basic Searching in Splunk
Creating Reports in Splunk Enterprise
Create Dashboards in Splunk Enterprise

Installing SNMP through the Command Line – Part 2

I added a batch script I wrote to install SNMP on a bunch of machine back on Jan. 14, 2012 (http://www.anthonyreinke.com/?p=455).  I have since modified the script.  Changing the file from a .bat to a .cmd will allow you to right click and run as administrator on Windows 2008.  Also I noticed in 2008, it defaults in to having the localhost as the only system that can communicate to the SNMP Service.

PsExec.exe @hosts.txt -s -c installsnmp.cmd

Below is the file to download.  Rename the file to installsnmp.cmd
installsnmp.cmd.txt

As always, please contact me if you have questions.

@echo off
cls
REM Detect if the system is Windows Server 2003
systeminfo | find "2003" > nul
if %ERRORLEVEL% == 0 goto 2003
REM Detect if the system is Windows XP
systeminfo | find "XP Pro" > nul
if %ERRORLEVEL% == 0 goto XPPro
REM Detect if the system is Windows XP
systeminfo | find "2008" > nul
if %ERRORLEVEL% == 0 goto 2008
REM If the system is Windows Vista, Windows Server 2008, or higher, 
REM they have the required files built in.
goto ERROR
:2003
REM If Windows 2003, set the path to the i386 directory
REM Note: The path needs to be one level above the i386 directory
REM Example: if the path is \\server\share\windows2003\i386\ then
REM the path would be \\server\share\windows2003\
REM Note that the you need both a 32bit and 64bit versions
if (%PROCESSOR_ARCHITECTURE%) == (AMD64) (
echo Windows Registry Editor Version 5.00
echo.
echo [HKEY_LOCAL_MACHINE\SOFTWARE\Microsoft\Windows\CurrentVersion\Setup]
echo "SourcePath"="\\\\server\\share\\Extracted\\Win2003x64\\"
echo "ServicePackSourcePath"="\\\\server\\share\\Extracted\\Win2003x64\\"
) > %temp%\setW2003Path.reg
IF (%PROCESSOR_ARCHITECTURE%) == (x86) (
echo Windows Registry Editor Version 5.00
echo.
echo [HKEY_LOCAL_MACHINE\SOFTWARE\Microsoft\Windows\CurrentVersion\Setup]
echo "SourcePath"="\\\\server\\share\\Extracted\\Win2003\\"
echo "ServicePackSourcePath"="\\\\server\\share\\Extracted\\Win2003\\"
) > %temp%\setW2003Path.reg
REM Installing the created Registry File
regedit /s /q %temp%\setW2003Path.reg
goto SNMP
:XPPro
REM If Windows XP Professional, set the path to the i386 directory
REM Note: The path needs to be one level above the i386 directory
REM Example: if the path is \\server\share\windowsXP\i386\ then
REM the path would be \\server\share\windowsXP\
if (%PROCESSOR_ARCHITECTURE%) == (AMD64) (
(
echo Windows Registry Editor Version 5.00
echo.
echo [HKEY_LOCAL_MACHINE\SOFTWARE\Microsoft\Windows\CurrentVersion\Setup]
echo "SourcePath"="\\\\server\\share\\Extracted\\XPProx64\\"
echo "ServicePackSourcePath"="\\\\server\\share\\Extracted\\XPProx64\\"
) > %temp%\setXPProPath.reg
) ELSE IF (%PROCESSOR_ARCHITECTURE%) == (x86)
(
echo Windows Registry Editor Version 5.00
echo.
echo [HKEY_LOCAL_MACHINE\SOFTWARE\Microsoft\Windows\CurrentVersion\Setup]
echo "SourcePath"="\\\\server\\share\\Extracted\\XPPro\\"
echo "ServicePackSourcePath"="\\\\server\\share\\Extracted\\XPPro\\"
) > %temp%\setXPProPath.reg
)
REM Installing the created Registry File
regedit /s /q %temp%\setXPProPath.reg.reg
goto SNMP
:2008
REM Since 2008 stopped using the sysocmgr.exe to install features, in Vista and higher
REM you need to use the servermanagercmd.exe to add features. A great list of the 
REM features and their command line install string is at:
REM http://www.techrepublic.com/blog/datacenter/install-windows-server-2008-features-with-servermanagercmd/294
servermanagercmd.exe -install SNMP-Services
goto Strings
:SNMP
REM Building the Unattended Install
(
echo ;SetupMgrTag
echo [NetOptionalComponents]
echo SNMP=1
echo [SNMP]
echo Any_Host=YES
) > %temp%\snmp.txt
REM Installing the SNMP application with the Unattended Install
sysocmgr /i:%windir%\inf\sysoc.inf /u:%temp%\snmp.txt
goto Strings
:Strings
REM Removing the public string
(
echo Windows Registry Editor Version 5.00
echo.
echo [-HKEY_LOCAL_MACHINE\SYSTEM\ControlSet001\Services\SNMP\Parameters\ValidCommunities]
REM Removing the only allow localhost communication, by default 2008 will only allow the 
REM localhsot to talk to the SNMP service
echo [-HKEY_LOCAL_MACHINE\SYSTEM\ControlSet001\services\SNMP\Parameters\PermittedManagers]
REM Setting the SNMP strings
echo.
REM Setting the SNMP Contact Info
echo [HKEY_LOCAL_MACHINE\SYSTEM\ControlSet001\Services\SNMP\Parameters\RFC1156Agent]
echo "sysContact"="Server Administrators"
echo "sysLocation"="Server Room"
echo "sysServices"=dword:0000004f
echo.
REM Setting the Read Only and Read Write Communities
echo [HKEY_LOCAL_MACHINE\SYSTEM\ControlSet001\Services\SNMP\Parameters\ValidCommunities]
echo "readonly"=dword:00000004
echo "readwrite"=dword:00000008
echo.
REM Creating the Permitted Managers Key
echo [HKEY_LOCAL_MACHINE\SYSTEM\ControlSet001\services\SNMP\Parameters\PermittedManagers]
echo.
) > %temp%\setupsnmp.reg
REM Installing the created Registry File
regedit /s /q %temp%\setupsnmp.reg
REM Cleaning Up
IF EXIST %temp%\setupsnmp.reg del %temp%\setupsnmp.reg
IF EXIST %temp%\setW2003Path.reg del %temp%\setW2003Path.reg
IF EXIST %temp%\setXPProPath.reg.reg del %temp%\setXPProPath.reg.reg
IF EXIST %temp%\snmp.txt del %temp%\snmp.txt
echo %COMPUTERNAME% Complete >> \\server\share\SNMP\SNMPInstall.txt
goto END
:ERROR
echo.
echo Could not determine the OS type
pause
goto END
:END